Today we are going to explore basic 3D animation. Obviously you can tell by the picture on the right, we aren't going to be doing very complex animations, but it will help you understand the concepts of 3D Animation.
Again, I am including a video tutorial below.
Showing posts with label Bryce. Show all posts
Tuesday, January 10, 2012
Thursday, January 5, 2012
Bryce: Outer Space
Todays project is really the absence of terrain... and sky... and haze. It's space. In this instance we will be creating a moon, stars, a comet or two, and [if you want] some sort of space craft.
I am also including a video tutorial below if you need the extra help.
Here's another tutorial on producing photo-realistic planets:
I am also including a video tutorial below if you need the extra help.
Here's another tutorial on producing photo-realistic planets:
Wednesday, January 4, 2012
Bryce: Organic Shapes (Horns, Shells, Etc.)
Today we will be creating some natural looking shapes by using the Multiple Replicate function of Bryce.
Shape #1:
Shape #1:
- Add a Torus (doughnut) Shape
- Rotate (hold Shift) the Torus so it's flat/horizontal
- Click on the A button and select the "Show Origin Handle" checkbox and click the checkmark
- The green dot in the center of the Torus is the "Origin Handle". Drag that to the right... outside of the bounding box
- Now go to EDIT > Multi-Replicate
- Set your Quantity to something like 50
- Set your Offset to 0,0,0 (no offset when replicating)
- Set Rotate to 10,0,0 (that rotates it 10 degrees for each replicate)
- Set Size to 97,97,97 (which is the percentage of the previous replication for this replication)
- Click the checkmark to create your shape
- Give your new shape a texture
Shape #2:
- Add a Torus (doughnut) Shape
- Rotate (hold Shift) the Torus so it's flat/horizontal
- Click on the A button and select the "Show Origin Handle" checkbox and click the checkmark
- The green dot in the center of the Torus is the "Origin Handle". Drag that to the right... outside of the bounding box
- Now go to EDIT > Multi-Replicate
- Set your Quantity to something like 40
- Set your Offset to 1.5, 0, 0 (this will help the shape extrude out a little)
- Set Rotate to 10, 0, 0
- Set Size to 97, 97, 97
- Click the checkmark to create your shape
- Give your new shape a texture
Monday, January 2, 2012
Bryce: 3D Model Using Symmetrical Lattice
We have used the Symmetrical Lattice tool to build a 3D logo, but we haven't yet tried to build an object to be used in a full scene. For example, if I wanted to create a graveyard for a Halloween scene, I could make gravestone blocks or even crosses, but what if I wanted more detail? I could create a "bump map" (a square image where black is the lowest elevation and white is the highest) just as we did with our City Scene.
Here are some examples:
If you're looking for even more detail, you can create a painting in Photoshop such as this:
We are going to use these techniques to build a sword from separate pieces. For example:
Thursday, December 15, 2011
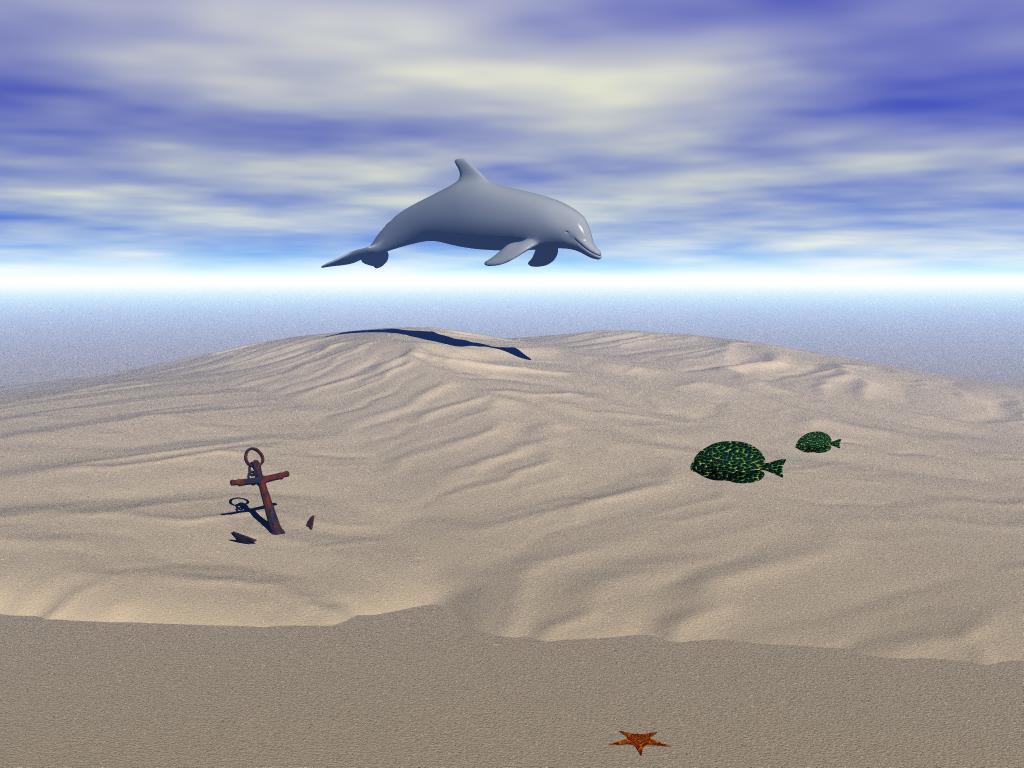
Bryce: Underwater Scene
First of all, create your overall scene (don't worry about making it underwater yet):
- Change your plane into something natural which you would find under water (i.e. sand)
- Add a Terrain and erode it to look natural and weathered, then apply the proper texture
- Add some items that you would find under water (i.e. anchor, fish, dolphin, etc.)
- Add a water plane and move it up above your scene to create a water surface.
- Try different skies until you find one that looks more realistic.
- Next, add some haze and fog and adjust the colors accordingly.
- Finally, add a spotlight and a filter to make light ripples.
Wednesday, December 14, 2011
Bryce: Streaming Light
Today we are going to do a project that adds realism to a piece of work, but requires some specific steps and setup.
Step 1: Disable Sunlight Before beginning, go into the SKY LAB - Click Sky & Fog and then the "Rainbow" then click Disable Sunlight. | |
Step 2: Create a Block Use the Resize tool to flatten the block into a wall shape. | |
Step 3: Reposition the Wall Use the Reposition tool to move the wall back. | |
Step 4: Resize the Wall Use the Resize tool to raise the height and expand the width of your wall. | |
Step 5: Create a Second Wall Do a CTRL+C (to Copy) and then CTRL+V (to Paste) Hold SHIFT and drag ROTATE to make a wall at a 90 degree angle | |
Step 6: Reposition the Second Wall Use the Reposition tool to move it to the back. | |
Step 7: Create the Ceiling CTRL+C (Copy) and CTRL+V (Paste) to create a new "Wall" Use the Rotate tool (Z Axis) while holding SHIFT to make the new wall flat. | |
Step 8: Move the Ceiling Up Raise the ceiling up using the Reposition tools. | |
Step 9: Resize the Ceiling You want to have a ceiling large enough that you don't see light hitting the floor in your room. Use the Resize tools (Front X and Z Axis) to make the ceiling larger. Render the scene to make sure you have it covered. If everything is correct, the rendered scene will be very dark. | |
Step 10: Create a Window-Shaped Block Create a block and use the Resize tools to make it "window-shaped". Use the Resize tool to drag out the Back Z Axis so that it easily goes through the back wall. This shape will be used to cut a hole in the wall. | |
Step 11: Make the Block Negative With the block selected, click on the A (Attributes) button. Set the shape as "Negative" and deselect "Transfer Material of Negative Boolean" | |
Step 12: Make the Wall Positive Click the A (Attributes) Select the Positive bullet Click the check mark. | |
Step 13: Make the Window Cutout Select the block (the negative object). Hold SHIFT and click the wall (the positive object) Click the G (Group) button. You should see a cutout shape in your wall. | |
Step 14: Render Your Scene If you render your scene now, you should see a window shape. | |
Step 15: Begin Bars for Windows While I personally don't LIKE bars on windows, adding them to this project allows the light streaming through the window to be broken up a little bit more. It adds some interest to the final render. | |
Step 16: Finish the Bar Use the cube in the center of the Resize tool to shrink your cylinder down to the thickness of a bar for the window. Then stretch the shape out by grabbing the Y axis in the Resize tool to create the final bar shape. | |
Step 17: Copy the Finished Bar Do a CTRL+C (Copy) and a CTRL+V (Paste) to make a copy of the bar. Then use the arrows on the Reposition tool to drag the bar over. Continue doing this until you have a series of bars. | |
Step 18: Group, Copy, & Rotate Bars Next, hold SHIFT and select all of the bars. Click G (Group) then CTRL+C (Copy) then CTRL+V (Paste). Use the Rotate band while holding SHIFT to cross the bars. | |
Step 19: Reposition the Bars Into the Windows Use the Reposition tool to move the bars back and into the window opening. Do a Render to check positioning. | |
Step 20: Add a Spotlight Create a new "Square Spotlight" (pyramid shaped). Use the Resize tool (Y axis) and shorten the light about half way. | |
Step 21: Reposition the Spotlight Use the Rotate tool and the Reposition tool to move the spotlight to the outside of the wall facing in through the window. Note the shadow cast on the floor in the example. | |
Step 22: Adjust Spotlight Properties (see image) |
Finally, you can add some textures, additional items or even change the color of the light to get a fairly realistic scene.
Tuesday, December 13, 2011
Bryce: Cave or Tunnel Scene
Use your Boolean Difference technique to create a cave or tunnel scene. You may need some sort of lighting to make it work.In this example [right] I added a water plane and some ships, but I also added some fire and a light on the wall of the cave.
You might also have some luck adding haze and fog, or even adjusting the colors in the sky. You can also experiment with adding external models.
Friday, December 9, 2011
Bryce: A Winter / Snowman Scene
Today I would like you to create a scene in Bryce set in Winter and featuring a snowman and/or a snow globe. - Change the texture of the Plane (it starts out as a flat gray)
- Adjust the sky / change the texture
- Add some objects (trees, rocks, snow, or whatever)
When finished, make sure to:
- Save your document (FILE > SAVE AS > whatever.BR7)
- FULLY render your scene
- Save your image (FILE > SAVE IMAGE AS > whatever.JPG)
- Upload your project to your portfolio.
Be creative and have fun!
Wednesday, December 7, 2011
Bryce: Boolean Difference
Today we will be learning how to create a "Boolean Difference" in Bryce -- basically meaning you cut one shape out of another shape. The image below features a "cave" that was created by cutting a "symmetrical lattice" (looks like a mountain on top of an upside down mountain) out of a regular "terrain" (a mountain). You can cut a block out of a sphere... a cone out of a pyramid, or whatever other shapes you might need.
To begin this process:
- Place the two shapes together intersecting one another (touching)
- Select the shape you want to use as a "cutting tool" and click the "A" (Attributes) tool.
- Select the "Negative" bullet and un-check the "Transfer Materials of Negative Boolean" option.
- Click the "check mark" to okay the change.
- Select the shape you want to cut IN to (the shape you want to keep).
- Click the "A" (Attributes) button.
- Select the "Positive" bullet mark and click the check mark to okay the change.
- Select the 1st object (i.e. the "negative" piece)
- Hold SHIFT and select the 2nd object (i.e. the "positive" piece)
- If it looks like you have other objects selected, deselect and try again. You may have to rotate the scene a bit to make clicking easier.
- With both pieces selected, click the "G" (Group) tool.
Tuesday, December 6, 2011
Bryce: Rounded Shapes: Bowls, Plates, etc.
We have a substitute teacher today, but I am still on campus. I expect students to treat my substitute with respect and courtesy.
Today we will use the Terrain tool and a large, soft brush to create a rounded shape (i.e. a bowl). Similarly you can use the "round edges" button to round existing Terrain shapes.
As with many of our projects in Bryce, we will be using a Terrain to build a shape:
- Create a new Terrain object.
- Click the E to Edit the Terrain.
- Click the New button (or drop the elevation to black and paint over the whole Terrain).
- Move the elevation all the way up (white).
- Choose a soft-edged brush -- the largest available -- and center your brush on the screen (See Figure 1).
- Click a few times. You will notice a rounded shape in your preview window (See Figure 2).
- Open the Brush Behavior window (Figure 3 #1)
- Drag the bottom elevation slider (Figure 3 #2) up slightly [until the background turns red].
- Click the Check Mark to accept changes to your new "rounded terrain"
- Use your EDIT tools to rotate, resize, and reposition your new object.
- Add a texture and use the object in a scene.
|
|
|
Wednesday, November 30, 2011
Bryce: 3D Logo
Today we're going to experiment with using Bryce Symmetrical Lattice to make a 3D logo. On the right you can see the finished YouTube logo in 3D, while on the left (below) you can see the original. I applied the logo to the Symmetrical Lattice.
Here are some sample logo patterns -- however you should find (or create) your own:
Here are a couple different versions of a logo which you can use to create a "stained glass" effect. The left image being the "glass" and the right image being the "lead" borders:
Basically I create the first shape (a symmetrical lattice) and then COPY it and PASTE the second shape directly on top of the first shape. Then I just have to apply a new "bump map". See below:
Here's how it would look fully rendered in Bryce:
Subscribe to:
Posts (Atom)
REMEMBER:
• Add your name to your projects
• Save Photoshop projects as PSD and JPG
• Save Bryce projects as BR7 and [Save Image As] JPG
• Save Sculptris projects as SC1 and JPG and export it as an OBJ.
• Save Rhino projects as 3DM and JPG
• Save Flash projects as FLA and go to FILE>PUBLISH SETTINGS and publish as SWF and JPG
• Upload finished projects to your portfolio and/or your DeviantArt page
• Keep checking your grade on PowerSchool