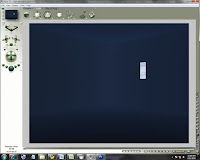
Step 1: Disable Sunlight Before beginning, go into the SKY LAB - Click Sky & Fog and then the "Rainbow" then click Disable Sunlight. | |
Step 2: Create a Block Use the Resize tool to flatten the block into a wall shape. | |
Step 3: Reposition the Wall Use the Reposition tool to move the wall back. | |
Step 4: Resize the Wall Use the Resize tool to raise the height and expand the width of your wall. | |
Step 5: Create a Second Wall Do a CTRL+C (to Copy) and then CTRL+V (to Paste) Hold SHIFT and drag ROTATE to make a wall at a 90 degree angle | |
Step 6: Reposition the Second Wall Use the Reposition tool to move it to the back. | |
Step 7: Create the Ceiling CTRL+C (Copy) and CTRL+V (Paste) to create a new "Wall" Use the Rotate tool (Z Axis) while holding SHIFT to make the new wall flat. | |
Step 8: Move the Ceiling Up Raise the ceiling up using the Reposition tools. | |
Step 9: Resize the Ceiling You want to have a ceiling large enough that you don't see light hitting the floor in your room. Use the Resize tools (Front X and Z Axis) to make the ceiling larger. Render the scene to make sure you have it covered. If everything is correct, the rendered scene will be very dark. | |
Step 10: Create a Window-Shaped Block Create a block and use the Resize tools to make it "window-shaped". Use the Resize tool to drag out the Back Z Axis so that it easily goes through the back wall. This shape will be used to cut a hole in the wall. | |
Step 11: Make the Block Negative With the block selected, click on the A (Attributes) button. Set the shape as "Negative" and deselect "Transfer Material of Negative Boolean" | |
Step 12: Make the Wall Positive Click the A (Attributes) Select the Positive bullet Click the check mark. | |
Step 13: Make the Window Cutout Select the block (the negative object). Hold SHIFT and click the wall (the positive object) Click the G (Group) button. You should see a cutout shape in your wall. | |
Step 14: Render Your Scene If you render your scene now, you should see a window shape. | |
Step 15: Begin Bars for Windows While I personally don't LIKE bars on windows, adding them to this project allows the light streaming through the window to be broken up a little bit more. It adds some interest to the final render. | |
Step 16: Finish the Bar Use the cube in the center of the Resize tool to shrink your cylinder down to the thickness of a bar for the window. Then stretch the shape out by grabbing the Y axis in the Resize tool to create the final bar shape. | |
Step 17: Copy the Finished Bar Do a CTRL+C (Copy) and a CTRL+V (Paste) to make a copy of the bar. Then use the arrows on the Reposition tool to drag the bar over. Continue doing this until you have a series of bars. | |
Step 18: Group, Copy, & Rotate Bars Next, hold SHIFT and select all of the bars. Click G (Group) then CTRL+C (Copy) then CTRL+V (Paste). Use the Rotate band while holding SHIFT to cross the bars. | |
Step 19: Reposition the Bars Into the Windows Use the Reposition tool to move the bars back and into the window opening. Do a Render to check positioning. | |
Step 20: Add a Spotlight Create a new "Square Spotlight" (pyramid shaped). Use the Resize tool (Y axis) and shorten the light about half way. | |
Step 21: Reposition the Spotlight Use the Rotate tool and the Reposition tool to move the spotlight to the outside of the wall facing in through the window. Note the shadow cast on the floor in the example. | |
Step 22: Adjust Spotlight Properties (see image) |
Finally, you can add some textures, additional items or even change the color of the light to get a fairly realistic scene.


No comments:
Post a Comment